So you want to get involved into 3d modeling? Here is the solution. First you might want to pick a program that suits you the most.
Autodesk 3ds max (expensive) http://usa.autodesk.com/adsk/servlet…&siteID=123112
Lightwave 3d (expensive) http://www.newtek.com/lightwave/
Autodesk Maya (expensive) http://usa.autodesk.com/adsk/servlet…&siteID=123112
Cinéma 4d (expensive) http://www.maxon.net/index.php?id=18&L=0
Blender (free) http://www.blender.org/
Daz studio Hexagon (costs somewhat) http://www.daz3d.com/i/software/hexagon?_m=d
Swift 3d stand-alone (costs somewhat) http://www.erain.com/Products/Swift3D/
Milkshape 3d (free) http://chumbalum.swissquake.ch/ms3d/download.html
Sketchup (free but I dont really advise it, bug good enough for weapons in pep) http://sketchup.google.com/
various:
http://www.youtube.com (this is no joke, video tutorials are really helpfull)
http://www.cgcookie.com/
http://www.3dm3.com
http://www.3dlessons.com/categories/…Tutorials.html
http://www.3d-tutorial.com/
Blender:
http://www.blender.org/education-help/tutorials/
Sketchup:
http://sketchup.google.com/training/videos.html
Cinéma 4d:
http://www.tutorialized.com/tutorials/Cinema-4D/1
Autodesk 3ds max:
http://www.3dsmaxtutorials.net/
Robby’s tutorial taking form: http://405th.com/forums/index.php?showtopic=25931
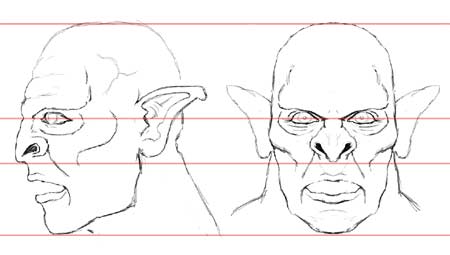
-Now when you start up your program ready to make an acurate 3d file you will need blueprints.
This contains a mainly frontal view, side view and back view. If you can get top and down its even better.
You will have to scale them to the same size and use lines to match it up like this
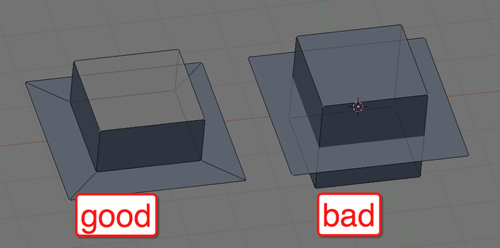
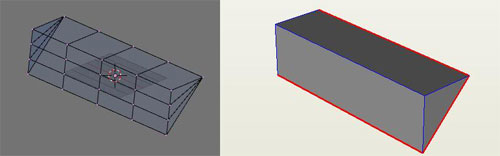
-The basic idea is to create a solid mesh.
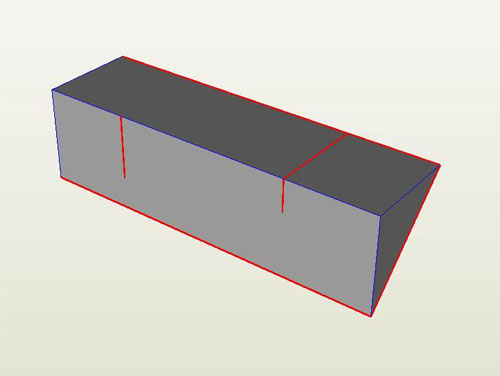
So you dont want difrent objects crossing eachother. Like in the example below.
-You can do this in diffrent ways. You can model it all at once for the more advanced users. or you can join them together with something called bolean join. (note: you wont have this in less up to date programs)
-Well the rest is just extruding and adding just vertices.
There are also diffrent modifiers to mirror, bevel, smooth,…
-Try not to get to many traingles when modeling. Just try to stay with polygons (squares)
This is better for rendering and the overall look. Almost every modeler hates traingles.
Only use them if you have no other way.
You mostly will get traingles after you bolean joined objects SO dont freak out. This is normal. But that is ok aslong as you dont edit it aftyerwards. Or you will get this problem.
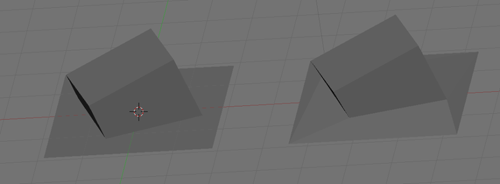
notice the traingles raising up a bit. Thats wy you should bolean join in the end and not during the modeling itself.
-Once your model is created you will need to export the 3d data. All these programs have diffrent options of exporting. But i suggest if you have the chance to export to .obj
This file extension is the most usable with every software there is. Its beloved in the 3d community.
-If your model looks like it has open edges (red lines) in pepakura like this.
(pic from Horgh) This means not all the faces of the 3d model are in the same direction.
to solve this, tab to switch to edit view. Watch in textured mode. Hit a to select all verts. Then hit Ctrl shift N. If your model now is somewhat transparent hit W wile all the verts are still selected. And choose “flip normals”.
If there still are some faces that are see hrough just select the face and do the flip normal again.
-If you still have red lines in pep it means you have double vertices.
To solve this just simply select your model go to edit view by hitting tab. Hit A to select all, then hit W and choose remove doubles.
-You can also have red lines due to bad edge flow.
The line on the left is caused by two vertices not lining up in the middle of the line. As the vertices don’t line up, the faces on either side of the line are not connected.
The lines on the right are caused what I like to call a “hidden face”, a face that sits fully inside the model (technically it can be on the outside, but it will be a lot more obvious). Pepakura designer can only work with one continuous surface, meaning that any line that is connected to more than two faces will be causing open edges.
Same model viewed in Blender:

The solution to the problem on the left is to make the two vertices in the middle match up, and remove doubles. The solution to the problem to the right is to delete the edge underlined in green. This will effectively remove the inside face (seen as a darker surface while in wireframe mode) and no open edges will occur.
-If you want to give your model a texture make sure the texture is all on one single .jpg or other photo file. Since pepakura only is able to read one texture at a time. So my advice, do diffrent objects at a time.
After you got the hang of the modeling its up to you to get as less as triangles. Modelers hate it! since they couse bad poly flow and renders!
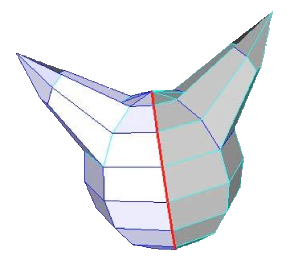
here is how you can make better loops in your models without having the need of a triangle.
If you model like this the bolean should work normally in blender. I know its somethines anoying. But try to model it instead of merging it first. I only use the bolean to ad cillinders to my mesh.
-Also pepakura only reads the base mesh. So dont get your hopes up that it reads bumpmaps. Even if it could read this it would be ridiculously hard to make.
This is just the basic idea of pepakura modeling. Now get cracking and learn the basics of a 3d program!
Now when you are able to model with all this knowledge you might want to get cracking on making it wearable. I happened to find this 3d model (standard mudbox mesh) the best and having the most realistic anatomy.
download link 3d body mesh: Download